
参考官方文档容器运行时 | Kubernetes
如果未说明就是在所有节点操作
一、环境准备
安装和配置先决条件
节点之中不可以有重复的主机名、MAC 地址或 product_uuid。
交换分区的配置。kubelet 的默认行为是在节点上检测到交换内存时无法启动。
如果 kubelet 未被正确配置使用交换分区,则你必须禁用交换分区。 例如,sudo swapoff -a 将暂时禁用交换分区。要使此更改在重启后保持不变,请确保在如 /etc/fstab
设置hosts文件
vim /etc/hosts
 10.0.0.80 k8s-master-80
 10.0.0.81 k8s-node-81
 10.0.0.82 k8s-node-82
设置安全组开放端口
如果节点间无安全组限制(内网机器间可以任意访问),可以忽略,否则,至少保证如下端口可通:
k8s-master节点:TCP:6443,2379,2380,60080,60081UDP协议端口全部打开
k8s-slave节点:UDP协议端口全部打开
设置iptables
systemctl stop firewalld
systemctl disable firewalld
sed -ri 's#(SELINUX=).*#\1disabled#' /etc/selinux/config
setenforce 0
systemctl disable firewalld && systemctl stop firewalld
getenforce 0
iptables -F
iptables -X
iptables -Z
iptables -P FORWARD ACCEPT禁用交换分区
 swapoff -a
 vim /etc/fstab
 # 注释掉swap挂载行
确保ntp、网络正确
yum install chrony -y
systemctl start chronyd
systemctl enable chronyd
date
hwclock -w
ping -c 2 www.bing.cnyum.repo设置阿里云源
仅供参考rockylinux镜像rockylinux下载地址rockylinux安装教程-阿里巴巴开源镜像站
设置内核参数
转发 IPv4 并让 iptables 看到桥接流量
执行下述指令:
cat <<EOF | sudo tee /etc/modules-load.d/k8s.conf
overlay
br_netfilter
EOF
sudo modprobe overlay
sudo modprobe br_netfilter
# 设置所需的 sysctl 参数,参数在重新启动后保持不变
cat <<EOF | sudo tee /etc/sysctl.d/k8s.conf
net.bridge.bridge-nf-call-iptables = 1
net.bridge.bridge-nf-call-ip6tables = 1
net.ipv4.ip_forward = 1
EOF
# 应用 sysctl 参数而不重新启动
sudo sysctl --system通过运行以下指令确认 br_netfilter 和 overlay 模块被加载:
 lsmod | grep br_netfilter
 lsmod | grep overlay
通过运行以下指令确认 net.bridge.bridge-nf-call-iptables、net.bridge.bridge-nf-call-ip6tables 和 net.ipv4.ip_forward 系统变量在你的 sysctl 配置中被设置为 1:
sysctl net.bridge.bridge-nf-call-iptables net.bridge.bridge-nf-call-ip6tables net.ipv4.ip_forward二、使用部署工具安装 Kubernetes
搭建你自己的 Kubernetes 生产集群有许多方法和工具。例如:
kubespray: 提供了 Ansible Playbook、 清单(inventory)、 制备工具和通用 OS/Kubernetes 集群配置管理任务领域的知识。 你可以通过 Slack 频道 #kubespray 联系此社区。
本文选用kubeadm安装
kubeadm 是 Kubernetes 主推的部署工具之一,将k8s的组件打包为了镜像,然后通过kubeadm进行集群初始化创建。
2.0.安装容器运行时
为了在 Pod 中运行容器,Kubernetes 使用 容器运行时(Container Runtime)。
默认情况下,Kubernetes 使用 容器运行时接口(Container Runtime Interface,CRI) 来与你所选择的容器运行时交互。
容器运行时
包括containerd CRI-O Docker Engine Mirantis容器运行时
这里我们选择containerd
安装containerd
1.设置docker CE repo为阿里云源
# step 1: 安装必要的一些系统工具
sudo yum install -y yum-utils
# Step 2: 添加软件源信息
yum-config-manager --add-repo https://mirrors.aliyun.com/docker-ce/linux/rhel/docker-ce.repo
2.安装containerd.io
 # Step 3: 安装containerd
 # yum list containerd.io --showduplicates #查看可安装版本
 sudo yum install -y containerd.io
3.修改配置文件,镜像加速源
containerd config default > /etc/containerd/config.toml
sed -i 's/SystemdCgroup = false/SystemdCgroup = true/' /etc/containerd/config.toml
sed -i 's#sandbox_image =.*#sandbox_image = "registry.aliyuncs.com/google_containers/pause:3.9"#' /etc/containerd/config.toml
sed -i '/.*plugins."io.containerd.grpc.v1.cri".registry.mirrors.*/ a\ [plugins."io.containerd.grpc.v1.cri".registry.mirrors."registry.k8s.io"]\n endpoint = ["https://registry.aliyuncs.com/google_containers"]\n [plugins."io.containerd.grpc.v1.cri".registry.mirrors."k8s.gcr.io"]\n endpoint = ["https://registry.aliyuncs.com/google_containers"]\n [plugins."io.containerd.grpc.v1.cri".registry.mirrors."docker.io"]\n endpoint = ["https://usydjf4t.mirror.aliyuncs.com"]' /etc/containerd/config.toml
# 修改配置文件需要重启containerd # Step 4: 开启congtainerd服务
systemctl enable containerd --now
systemctl status containerd2.1.安装 kubeadm、kubelet 和 kubectl
你需要在每台机器上安装以下的软件包:
kubeadm:用来初始化集群的指令。kubelet:在集群中的每个节点上用来启动 Pod 和容器等。kubectl:用来与集群通信的命令行工具。
kubeadm 不能帮你安装或者管理 kubelet 或 kubectl, 所以你需要确保它们与通过 kubeadm 安装的控制平面的版本相匹配。
设置yum仓库为阿里云源
kubernetes镜像kubernetes下载地址kubernetes安装教程-阿里巴巴开源镜像站
 cat <<EOF | tee /etc/yum.repos.d/kubernetes.repo
 [kubernetes]
 name=Kubernetes
 baseurl=https://mirrors.aliyun.com/kubernetes-new/core/stable/v1.29/rpm/
 enabled=1
 gpgcheck=1
 gpgkey=https://mirrors.aliyun.com/kubernetes-new/core/stable/v1.29/rpm/repodata/repomd.xml.key
 EOF
ps: 由于官网未开放同步方式, 可能会有索引gpg检查失败的情况, 这时请用 yum install -y --nogpgcheck kubelet kubeadm kubectl 安装
安装kubeadm、kubelet 和 kubectl,启动和设置自启kubelet
 yum clean all && yum makecache
 # yum list kubeadm --showduplicates #查看可安装版本
 yum install -y kubelet kubeadm kubectl
 systemctl enable kubelet && systemctl start kubelet
 # kubelet 现在每隔几秒就会重启,因为它陷入了一个等待 kubeadm 指令的死循环。
配置kubectl命令补全
 yum install bash-completion -y
 source <(kubectl completion bash)
 echo "source <(kubectl completion bash)" >> ~/.bashrc
2.2.使用 kubeadm 创建集群
初始化控制平面节点
在master节点执行
查看将要用到的组件
 # 查看将要用到的组件镜像列表
 root@k8s-master-80 ~]#kubeadm config images list --image-repository=registry.aliyuncs.com/google_containers
 I0513 21:44:32.823054   22154 version.go:256] remote version is much newer: v1.33.0; falling back to: stable-1.29
 registry.k8s.io/kube-apiserver:v1.29.15
 registry.k8s.io/kube-controller-manager:v1.29.15
 registry.k8s.io/kube-scheduler:v1.29.15
 registry.k8s.io/kube-proxy:v1.29.15
 registry.k8s.io/coredns/coredns:v1.11.1
 registry.k8s.io/pause:3.9
registry.k8s.io/etcd:3.5.16-0 kubeadm init \
--apiserver-advertise-address=10.0.0.80 \
--image-repository registry.aliyuncs.com/google_containers \
--service-cidr=10.96.0.0/16 \
--pod-network-cidr=10.244.0.0/16 \
--service-dns-domain=cluster.local \
--ignore-preflight-errors=Swap \
--ignore-preflight-errors=NumCPU
# 参数解释
API-Server地址
k8s版本
clusterIP
podIP网段
集群内dns后缀
忽略swap报错
忽略CPU报错kubeadm init | Kubernetes官方参数解释
kubeadm init 首先运行一系列预检查以确保机器为运行 Kubernetes 准备就绪。 这些预检查会显示警告并在错误时退出。然后 kubeadm init 下载并安装集群控制平面组件。这可能会需要几分钟。
[root@k8s-master-80 ~]#kubeadm init \
--apiserver-advertise-address=10.0.0.80 \
--image-repository registry.aliyuncs.com/google_containers \
--service-cidr=10.96.0.0/16 \
--pod-network-cidr=10.244.0.0/16 \
--service-dns-domain=cluster.local \
--ignore-preflight-errors=Swap \
--ignore-preflight-errors=NumCPU
I0513 21:59:49.982524 22907 version.go:256] remote version is much newer: v1.33.0; falling back to: stable-1.29
[init] Using Kubernetes version: v1.29.15
[preflight] Running pre-flight checks
[preflight] Pulling images required for setting up a Kubernetes cluster
[preflight] This might take a minute or two, depending on the speed of your internet connection
[preflight] You can also perform this action in beforehand using 'kubeadm config images pull'
[certs] Using certificateDir folder "/etc/kubernetes/pki"
[certs] Generating "ca" certificate and key
[certs] Generating "apiserver" certificate and key
[certs] apiserver serving cert is signed for DNS names [k8s-master-80 kubernetes kubernetes.default kubernetes.default.svc kubernetes.default.svc.cluster.local] and IPs [10.96.0.1 10.0.0.80]
[certs] Generating "apiserver-kubelet-client" certificate and key
[certs] Generating "front-proxy-ca" certificate and key
[certs] Generating "front-proxy-client" certificate and key
[certs] Generating "etcd/ca" certificate and key
[certs] Generating "etcd/server" certificate and key
[certs] etcd/server serving cert is signed for DNS names [k8s-master-80 localhost] and IPs [10.0.0.80 127.0.0.1 ::1]
[certs] Generating "etcd/peer" certificate and key
[certs] etcd/peer serving cert is signed for DNS names [k8s-master-80 localhost] and IPs [10.0.0.80 127.0.0.1 ::1]
[certs] Generating "etcd/healthcheck-client" certificate and key
[certs] Generating "apiserver-etcd-client" certificate and key
[certs] Generating "sa" key and public key
[kubeconfig] Using kubeconfig folder "/etc/kubernetes"
[kubeconfig] Writing "admin.conf" kubeconfig file
[kubeconfig] Writing "super-admin.conf" kubeconfig file
[kubeconfig] Writing "kubelet.conf" kubeconfig file
[kubeconfig] Writing "controller-manager.conf" kubeconfig file
[kubeconfig] Writing "scheduler.conf" kubeconfig file
[etcd] Creating static Pod manifest for local etcd in "/etc/kubernetes/manifests"
[control-plane] Using manifest folder "/etc/kubernetes/manifests"
[control-plane] Creating static Pod manifest for "kube-apiserver"
[control-plane] Creating static Pod manifest for "kube-controller-manager"
[control-plane] Creating static Pod manifest for "kube-scheduler"
[kubelet-start] Writing kubelet environment file with flags to file "/var/lib/kubelet/kubeadm-flags.env"
[kubelet-start] Writing kubelet configuration to file "/var/lib/kubelet/config.yaml"
[kubelet-start] Starting the kubelet
[wait-control-plane] Waiting for the kubelet to boot up the control plane as static Pods from directory "/etc/kubernetes/manifests". This can take up to 4m0s
[apiclient] All control plane components are healthy after 4.502043 seconds
[upload-config] Storing the configuration used in ConfigMap "kubeadm-config" in the "kube-system" Namespace
[kubelet] Creating a ConfigMap "kubelet-config" in namespace kube-system with the configuration for the kubelets in the cluster
[upload-certs] Skipping phase. Please see --upload-certs
[mark-control-plane] Marking the node k8s-master-80 as control-plane by adding the labels: [node-role.kubernetes.io/control-plane node.kubernetes.io/exclude-from-external-load-balancers]
[mark-control-plane] Marking the node k8s-master-80 as control-plane by adding the taints [node-role.kubernetes.io/control-plane:NoSchedule]
[bootstrap-token] Using token: woelnb.8lu4x3dhwto7rt1i
[bootstrap-token] Configuring bootstrap tokens, cluster-info ConfigMap, RBAC Roles
[bootstrap-token] Configured RBAC rules to allow Node Bootstrap tokens to get nodes
[bootstrap-token] Configured RBAC rules to allow Node Bootstrap tokens to post CSRs in order for nodes to get long term certificate credentials
[bootstrap-token] Configured RBAC rules to allow the csrapprover controller automatically approve CSRs from a Node Bootstrap Token
[bootstrap-token] Configured RBAC rules to allow certificate rotation for all node client certificates in the cluster
[bootstrap-token] Creating the "cluster-info" ConfigMap in the "kube-public" namespace
[kubelet-finalize] Updating "/etc/kubernetes/kubelet.conf" to point to a rotatable kubelet client certificate and key
[addons] Applied essential addon: CoreDNS
[addons] Applied essential addon: kube-proxy
Your Kubernetes control-plane has initialized successfully!
To start using your cluster, you need to run the following as a regular user:
mkdir -p $HOME/.kube
sudo cp -i /etc/kubernetes/admin.conf $HOME/.kube/config
sudo chown $(id -u):$(id -g) $HOME/.kube/config
Alternatively, if you are the root user, you can run:
export KUBECONFIG=/etc/kubernetes/admin.conf
You should now deploy a pod network to the cluster.
Run "kubectl apply -f [podnetwork].yaml" with one of the options listed at:
https://kubernetes.io/docs/concepts/cluster-administration/addons/
Then you can join any number of worker nodes by running the following on each as root:
kubeadm join 10.0.0.80:6443 --token woelnb.8lu4x3dhwto7rt1i \
--discovery-token-ca-cert-hash sha256:0c94503a9cdbdff62eeebdba6538d4fcd6fc5c4740952f72399c5ab2200e8da2 整个初始化过程基本是
- 生成证书,集群内组件通信走证书加密
- 创建k8s组件配置文件
- 控制平面pod生成,几大组件生成
-生成认证、授权规则
-生成插件coredns,kube-proxy
-以及根据最后的要求,创建配置文件、设置网络插件、Node加入集群即可。查看生成的端口,组件进程信息
 [root@k8s-master-80 ~]#netstat -tunlp
 Active Internet connections (only servers)
 Proto Recv-Q Send-Q Local Address           Foreign Address         State       PID/Program name
 tcp        0      0 127.0.0.1:10249         0.0.0.0:*               LISTEN      23766/kube-proxy
 tcp        0      0 127.0.0.1:10248         0.0.0.0:*               LISTEN      23668/kubelet
 tcp        0      0 127.0.0.1:10257         0.0.0.0:*               LISTEN      23550/kube-controll
 tcp        0      0 127.0.0.1:10259         0.0.0.0:*               LISTEN      23572/kube-schedule
 tcp        0      0 127.0.0.1:2381          0.0.0.0:*               LISTEN      23521/etcd
 tcp        0      0 127.0.0.1:2379          0.0.0.0:*               LISTEN      23521/etcd
 tcp        0      0 10.0.0.80:2380          0.0.0.0:*               LISTEN      23521/etcd
 tcp        0      0 10.0.0.80:2379          0.0.0.0:*               LISTEN      23521/etcd
 tcp        0      0 0.0.0.0:22              0.0.0.0:*               LISTEN      808/sshd: /usr/sbin
 tcp        0      0 127.0.0.1:44751         0.0.0.0:*               LISTEN      20262/containerd
 tcp6       0      0 :::6443                 :::*                    LISTEN      23532/kube-apiserve
 tcp6       0      0 :::10250                :::*                    LISTEN      23668/kubelet
 tcp6       0      0 :::10256                :::*                    LISTEN      23766/kube-proxy
 tcp6       0      0 :::22                   :::*                    LISTEN      808/sshd: /usr/sbin
 udp        0      0 127.0.0.1:323           0.0.0.0:*                           781/chronyd
 udp6       0      0 ::1:323                 :::*                                781/chronyd
根据要求设置master
要使非 root 用户可以运行 kubectl,请运行以下命令, 它们也是 kubeadm init 输出的一部分:
 mkdir -p $HOME/.kube
 sudo cp -i /etc/kubernetes/admin.conf $HOME/.kube/config
 sudo chown $(id -u):$(id -g) $HOME/.kube/config
或者,如果你是 root 用户,则可以运行:
export KUBECONFIG=/etc/kubernetes/admin.conf踩坑,如果我是root用户,我也最好执行 cp -i /etc/kubernetes/admin.conf $HOME/.kube/config把配置文件拷贝过来,不然每次重启还得去宣告这个KUBECONFIG变量。
 Then you can join any number of worker nodes by running the following on each as root:
 # 保留如下信息,待会Node加入集群
 kubeadm join 10.0.0.80:6443 --token woelnb.8lu4x3dhwto7rt1i \
     --discovery-token-ca-cert-hash sha256:0c94503a9cdbdff62eeebdba6538d4fcd6fc5c4740952f72399c5ab2200e8da2
查看k8s-Node节点信息
 [root@k8s-master-80 ~]#kubectl get nodes
 NAME            STATUS     ROLES           AGE     VERSION
k8s-master-80 NotReady control-plane 7m25s v1.29.15⚠️注意:此时使用 kubectl get nodes查看节点应该处于notReady状态,因为还未配置网络插件
若执行初始化过程中出错,根据错误信息调整后,执行kubeadm reset后再次执行init操作即可
2.3.部署Flannel网络插件(master)
GitHub - flannel-io/flannel: flannel is a network fabric for containers, designed for Kubernetes
kubectl apply -f https://github.com/flannel-io/flannel/releases/latest/download/kube-flannel.yml如果您使用自定义 podCIDR (不是 10.244.0.0/16 ),则首先需要下载上述清单并修改网络以匹配您的网络。
 # 检查关于flannel的容器信息
 [root@k8s-master-80 ~]#kubectl get pods -n kube-flannel
 NAME                    READY   STATUS    RESTARTS   AGE
 kube-flannel-ds-dztck   1/1     Running   0          3m14s
 # flannel这种网络插件,以Daemonset控制器去运行pod,确保在主机上只有一个。
 kubectl get pods -n kube-flannel
 [root@k8s-master-80 ~]#kubectl get nodes
 NAME            STATUS   ROLES           AGE   VERSION
 k8s-master-80   Ready    control-plane   22m   v1.29.15
此时使用 kubectl get nodes查看节点应该处于Ready状态
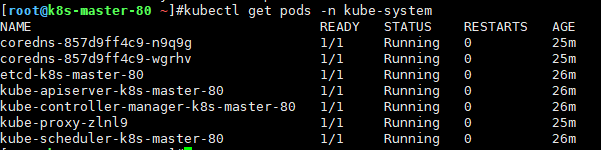
kubectl get pods -n kube-system确保全部是running POD工作都正确了
2.4.k8s-node加入k8s-master集群(node执行)
 提示
 如果忘记添加命令,可以通过如下命令生成(masterz执行):
 $ kubeadm token create --print-join-command
目前主节点,就看得到自己一个node (master上看)
 [root@k8s-master-80 ~]#kubectl get nodes -o wide
 NAME            STATUS   ROLES           AGE   VERSION    INTERNAL-IP   EXTERNAL-IP   OS-IMAGE                      KERNEL-VERSION                 CONTAINER-RUNTIME
 k8s-master-80   Ready    control-plane   31m   v1.29.15   10.0.0.80     <none>        Rocky Linux 9.5 (Blue Onyx)   5.14.0-503.14.1.el9_5.x86_64   containerd://1.7.27
k8s-node加入集群
[root@k8s-node-82 ~]#kubeadm join 10.0.0.80:6443 --token j94gdx.plkl2g35ujhnouij --discovery-token-ca-cert-hash sha256:0c94503a9cdbdff62eeebdba6538d4fcd6fc5c4740952f72399c5ab2200e8da2
[preflight] Running pre-flight checks
[preflight] Reading configuration from the cluster...
[preflight] FYI: You can look at this config file with 'kubectl -n kube-system get cm kubeadm-config -o yaml'
[kubelet-start] Writing kubelet configuration to file "/var/lib/kubelet/config.yaml"
[kubelet-start] Writing kubelet environment file with flags to file "/var/lib/kubelet/kubeadm-flags.env"
[kubelet-start] Starting the kubelet
[kubelet-start] Waiting for the kubelet to perform the TLS Bootstrap...
This node has joined the cluster:
* Certificate signing request was sent to apiserver and a response was received.
* The Kubelet was informed of the new secure connection details.
Run 'kubectl get nodes' on the control-plane to see this node join the cluster.查看k8s集群所有节点状态
# 得在控制平面(master)执行 [root@k8s-master-80 ~]#kubectl get node --show-labels=true -o wide
NAME STATUS ROLES AGE VERSION INTERNAL-IP EXTERNAL-IP OS-IMAGE KERNEL-VERSION CONTAINER-RUNTIME LABELS
k8s-master-80 Ready control-plane 34m v1.29.15 10.0.0.80 <none> Rocky Linux 9.5 (Blue Onyx) 5.14.0-503.14.1.el9_5.x86_64 containerd://1.7.27 beta.kubernetes.io/arch=amd64,beta.kubernetes.io/os=linux,kubernetes.io/arch=amd64,kubernetes.io/hostname=k8s-master-80,kubernetes.io/os=linux,node-role.kubernetes.io/control-plane=,node.kubernetes.io/exclude-from-external-load-balancers=
k8s-node-81 Ready <none> 2m11s v1.29.15 10.0.0.81 <none> Rocky Linux 9.5 (Blue Onyx) 5.14.0-503.14.1.el9_5.x86_64 containerd://1.7.27 beta.kubernetes.io/arch=amd64,beta.kubernetes.io/os=linux,kubernetes.io/arch=amd64,kubernetes.io/hostname=k8s-node-81,kubernetes.io/os=linux
k8s-node-82 Ready <none> 2m2s v1.29.15 10.0.0.82 <none> Rocky Linux 9.5 (Blue Onyx) 5.14.0-503.14.1.el9_5.x86_64 containerd://1.7.27 beta.kubernetes.io/arch=amd64,beta.kubernetes.io/os=linux,kubernetes.io/arch=amd64,kubernetes.io/hostname=k8s-node-82,kubernetes.io/os=linux看到都是ready就是 对的
三、验证集群是否可用
操作节点: 在master节点(k8s-master)执行
$ kubectl get nodes #观察集群节点是否全部Ready
创建测试nginx:1.14.2服务
使用 Pod
下面是一个 Pod 示例,它由一个运行镜像 nginx:1.14.2 的容器组成。
 apiVersion: v1
 kind: Pod
 metadata:
   name: nginx
 spec:
   containers:
   - name: nginx
     image: nginx:1.14.2
     ports:
     - containerPort: 80
要创建上面显示的 Pod,请运行以下命令:
kubectl apply -f https://k8s.io/examples/pods/simple-pod.yaml 回忆回忆,之前所学的pod创建原理流程查看创建结果
 [root@k8s-master-80 ~/.kube]#kubectl get pods -o wide
 NAME          READY   STATUS             RESTARTS        AGE   IP           NODE          NOMINATED NODE   READINESS GATES
 nginx         1/1     Running            0               45s   10.244.2.4   k8s-node-82   <none>           <none>
查看pod描述信息
kubectl describe pod nginx访问集群内nginx
 [root@k8s-master-80 ~/.kube]#curl -I 10.244.2.4
 HTTP/1.1 200 OK
 Server: nginx/1.14.2
 Date: Wed, 14 May 2025 01:53:04 GMT
 Content-Type: text/html
 Content-Length: 612
 Last-Modified: Tue, 04 Dec 2018 14:44:49 GMT
 Connection: keep-alive
 ETag: "5c0692e1-264"
 Accept-Ranges: bytes
0.创建的nginx容器名字,命名规则默认是
k8s_容器名_pod名_命名空间_随机id你可以去修改容器内信息,然后再访问
 [root@k8s-master-80 ~/.kube]#kubectl exec -it nginx bash
 root@nginx:/# echo "Welcome to K8s world.">/usr/share/nginx/html/index.html
[root@k8s-master-80 ~/.kube]#curl 10.244.2.4
Welcome to K8s world.删除pod
kubectl delete pod nginx四、删除k8s
如果部署过程出错,可以选择快照还原、或者环境清理
 # 在全部集群节点执行
 kubeadm reset
 ifconfig cni0 down && ip link delete cni0
 ifconfig flannel.1 down && ip link delete flannel.1
 rm -rf /run/flannel/subnet.env
 rm -rf /var/lib/cni/
 mv /etc/kubernetes/ /tmp
 mv /var/lib/etcd /tmp
 mv ~/.kube /tmp
 iptables -F
 iptables -t nat -F
 ipvsadm -C
 ip link del kube-ipvs0
 ip link del dummy0
五、 k8s命令总结
kubectl apply -f nginx-pod.yaml
kubectl get nodes
kubectl get pod
kubectl get pod -o wide
kubectl delete pod nginx
kubectl explain kubectl get nodes -v=7 #显示debug日志级别六、可选优化
配置kubectl命令补全
 yum install bash-completion -y
 source <(kubectl completion bash)
 echo "source <(kubectl completion bash)" >> ~/.bashrc
控制平面节点隔离(可选,让master也参与到pod调度)
默认情况下,出于安全原因,你的集群不会在控制平面节点上调度 Pod。 如果你希望能够在单机 Kubernetes 集群等控制平面节点上调度 Pod,请运行:
kubectl taint nodes --all node-role.kubernetes.io/control-plane-输出看起来像:
 node "test-01" untainted
 ...
这将从任何拥有 node-role.kubernetes.io/control-plane:NoSchedule 污点的节点(包括控制平面节点)上移除该污点。 这意味着调度程序将能够在任何地方调度 Pod。
此外,你可以执行以下命令从控制平面节点中删除 node.kubernetes.io/exclude-from-external-load-balancers 标签,这会将其从后端服务器列表中排除:
kubectl label nodes --all node.kubernetes.io/exclude-from-external-load-balancers-kube-proxy使用ipvs模式
如果未安装 ipvsadm,kube-proxy 会自动降级到 iptables 模式运行,这是一种安全的默认行为。如果需要更高性能的 IPVS 模式,需先安装 ipvsadm 并确保内核支持 IPVS 模块。
如果你希望使用 IPVS 模式,需要:
安装
ipvsadm工具:# Ubuntu/Debian apt-get install ipvsadm # CentOS/RHEL yum install ipvsadm加载 IPVS 内核模块:
# 临时加载 modprobe ip_vs modprobe ip_vs_rr # 按需加载所需算法模块 # 永久加载(添加到/modules-load.d/目录) cat > /etc/modules-load.d/ipvs.conf <<EOF ip_vs ip_vs_rr ip_vs_wrr ip_vs_sh nf_conntrack EOF修改 kube-proxy 配置:
 kubectl edit cm kube-proxy -n kube-system
 # 将 mode 改为 "ipvs"
重启 kube-proxy Pods:
kubectl delete pods -l k8s-app=kube-proxy -n kube-systemKubernetes 会自动重新创建 Pods 并应用新配置。